> ## Documentation Index
> Fetch the complete documentation index at: https://doc.onetoken.one/llms.txt
> Use this file to discover all available pages before exploring further.
# Coder
## Complete Guide: Configuring OneToken API in Coder
By integrating Coder with the OneToken platform, you can easily access a variety of powerful Large Language Models (LLMs). Follow the detailed, step-by-step guide below to complete the configuration.
### 📝 Prerequisites
Before you begin, please ensure you have the following ready:
* Registered and logged into the [OneToken Platform](https://onetoken.one/).
* Accessed the [OneToken Console](https://onetoken.one/console/token) and generated your unique **API Key** (please keep this safe and secure).
***
### ⚙️ Configuration Steps
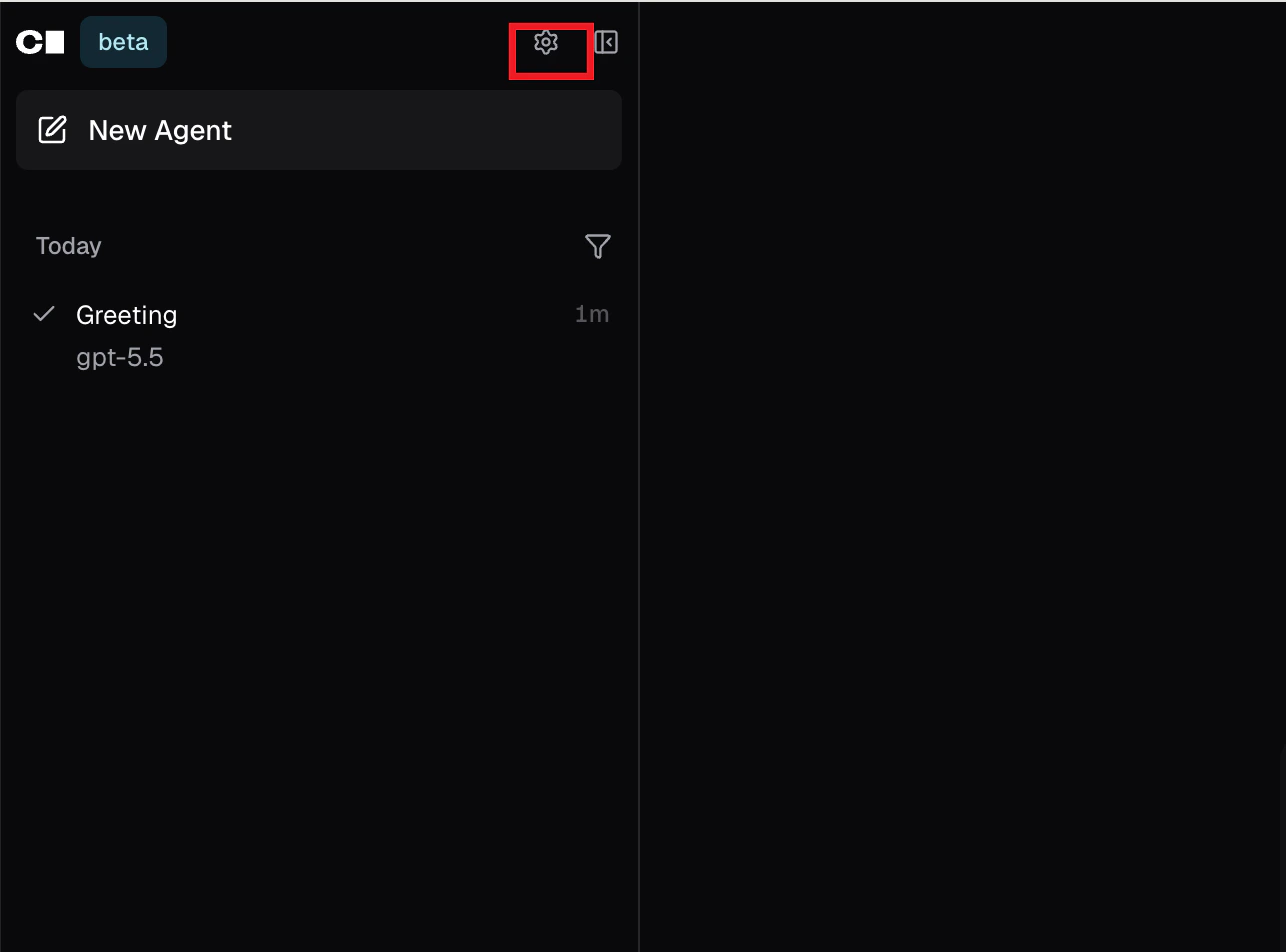
**1. Go to the Agent Settings**
Open the Coder interface and navigate to the dedicated Agent page. Find and click the "Settings" icon to enter the system's configuration backend.
 **2. Access the Manage Agent Menu**
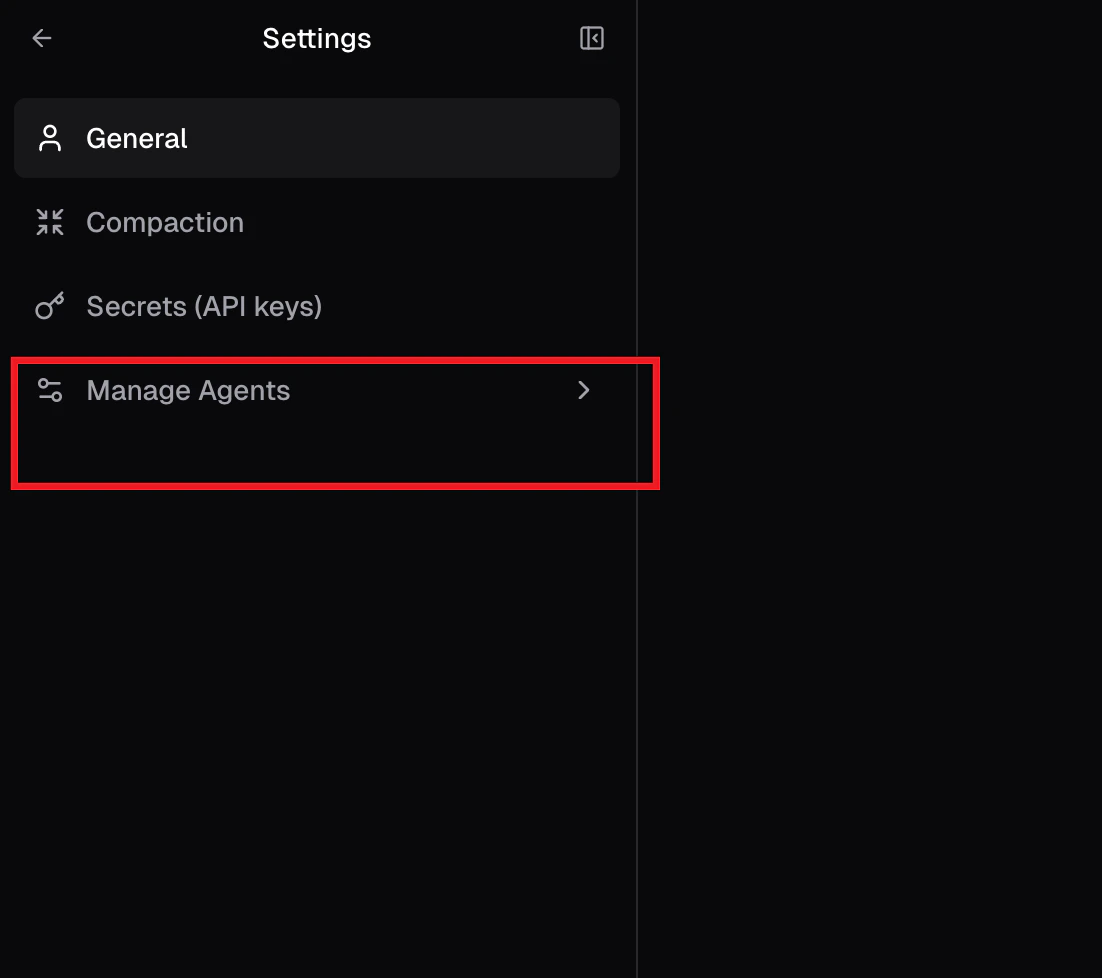
In the settings navigation bar, click on the "Manage Agent" menu to prepare for API binding.
**2. Access the Manage Agent Menu**
In the settings navigation bar, click on the "Manage Agent" menu to prepare for API binding.
 **3. Select the Model Provider**
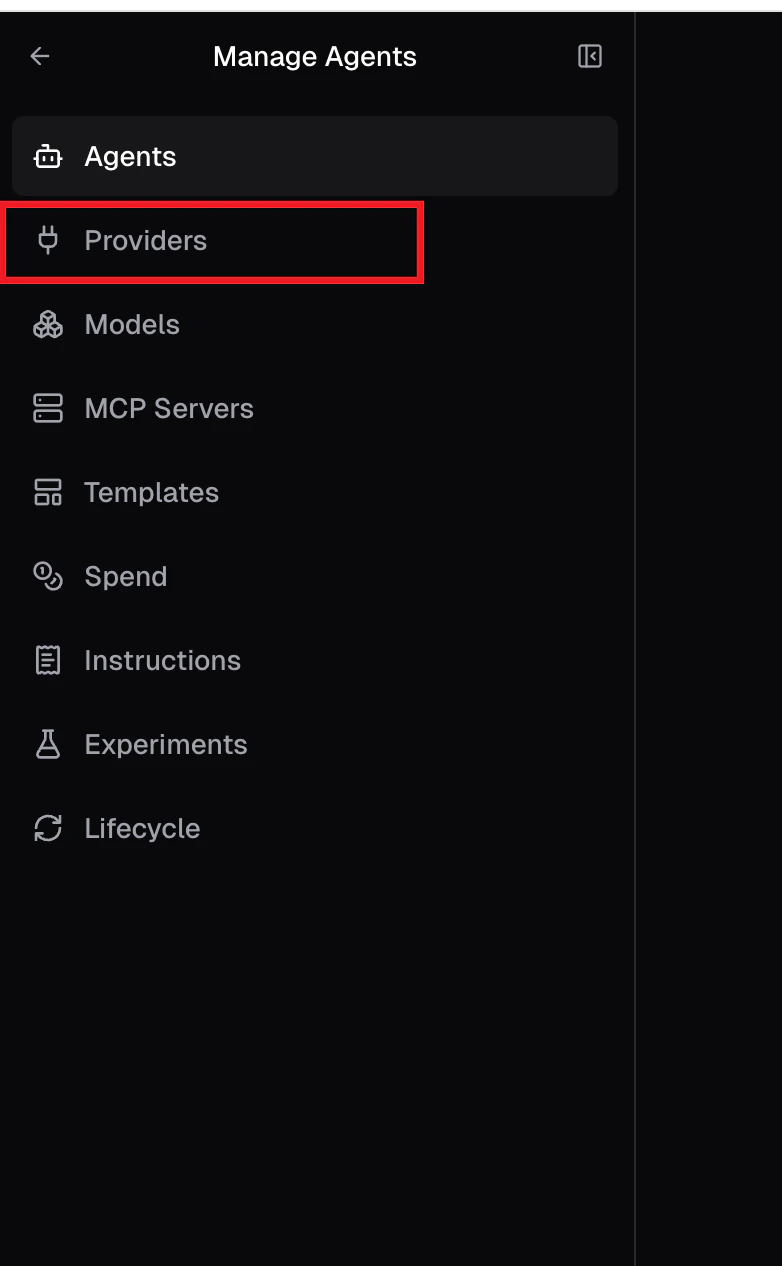
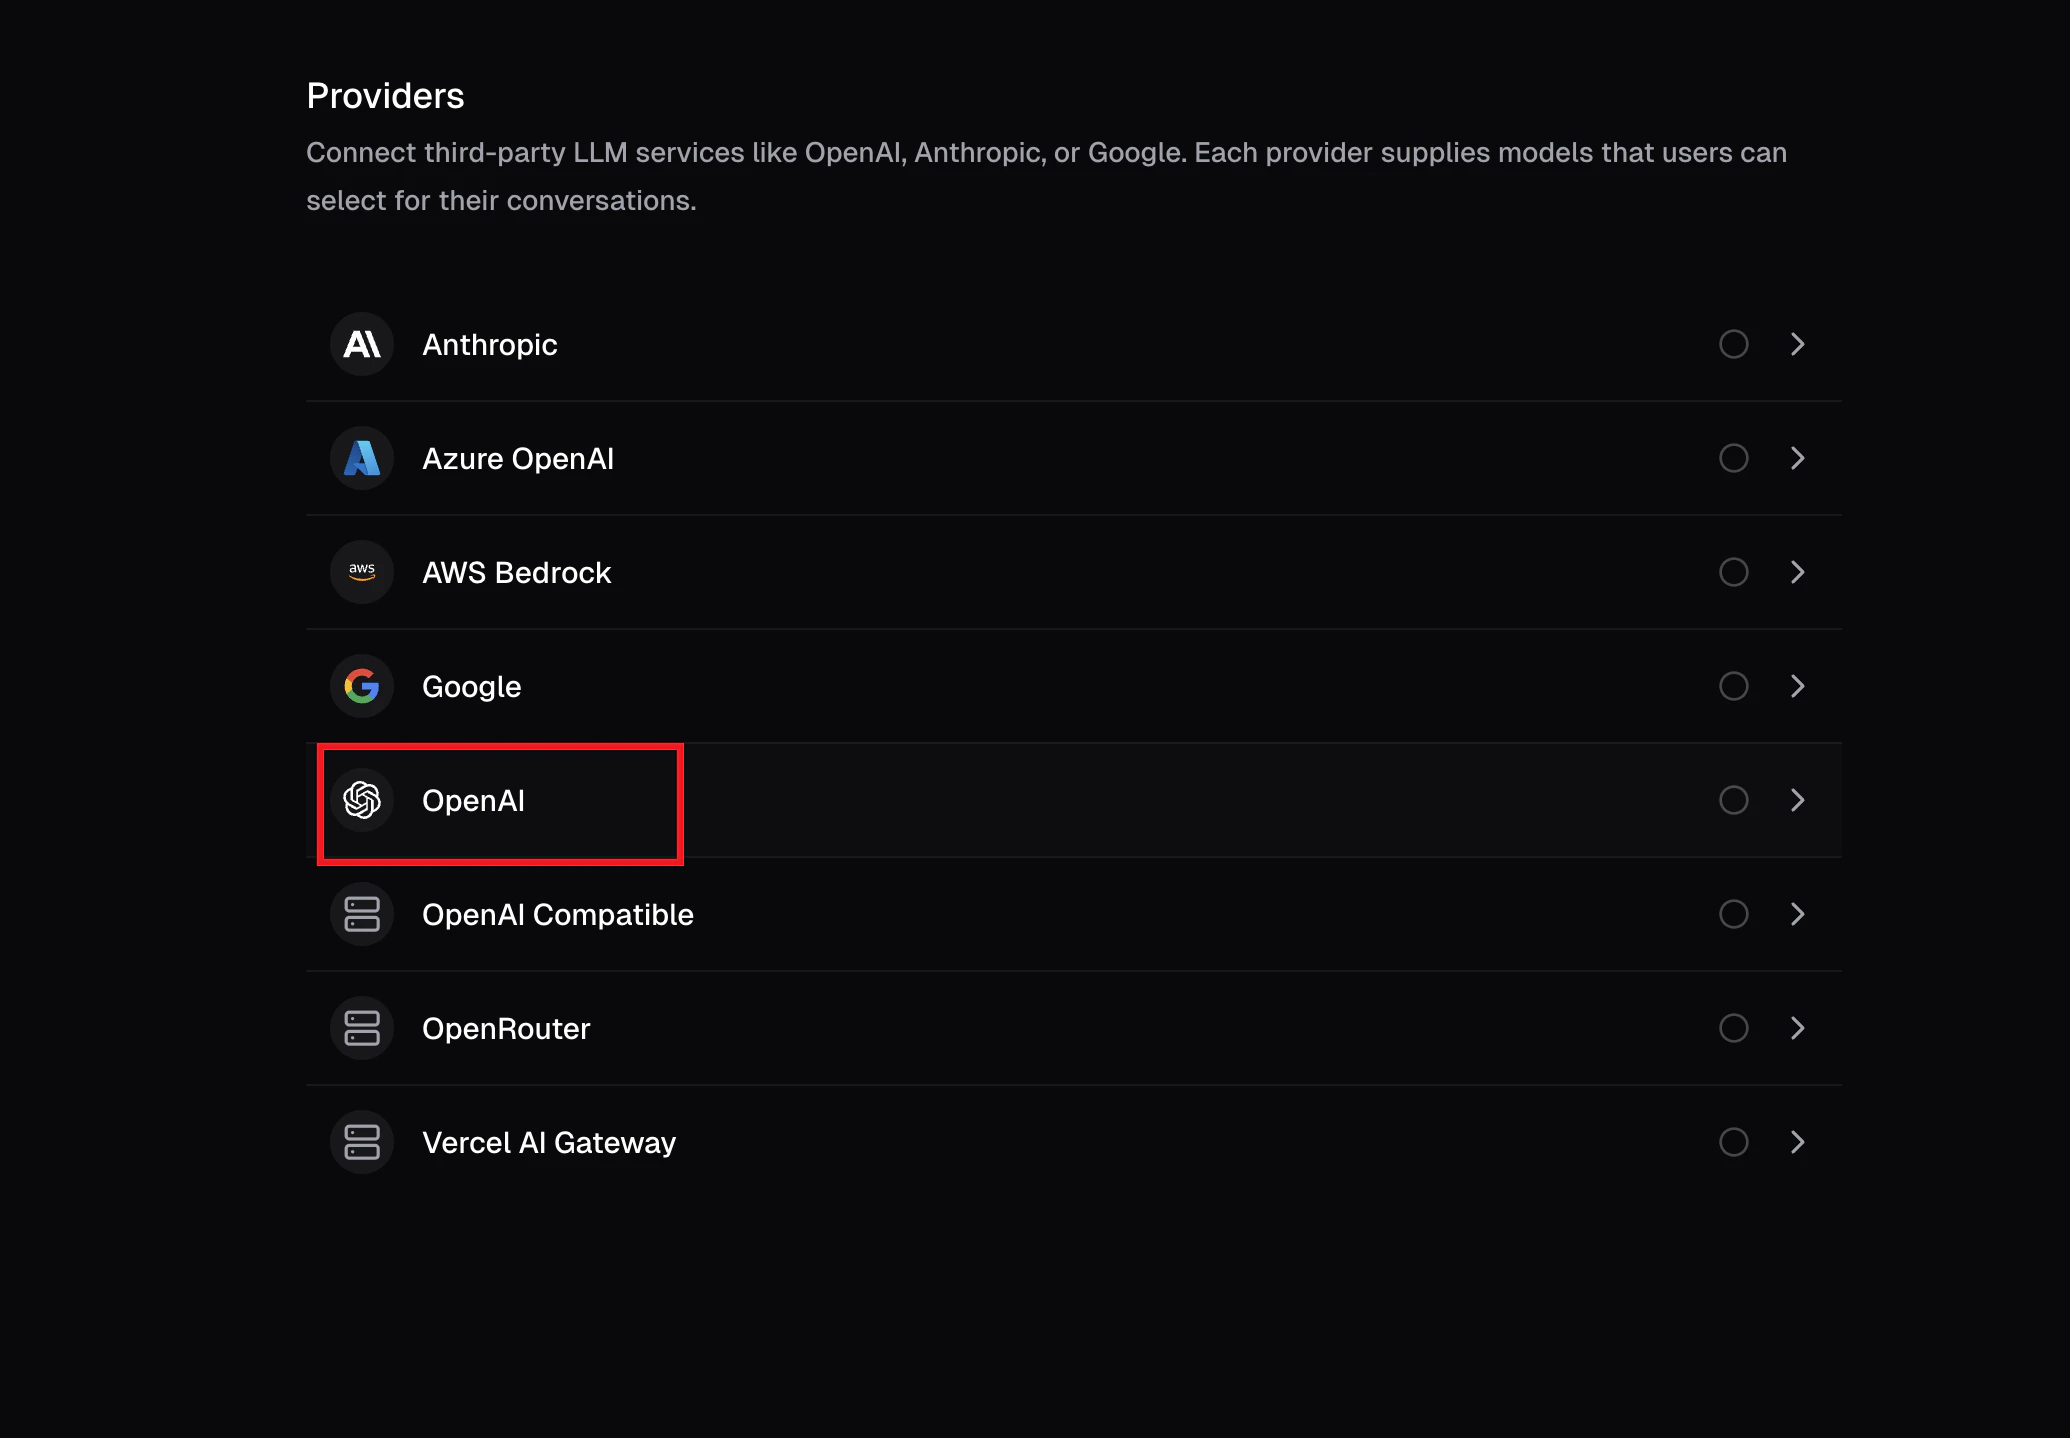
Click to enter the "Providers" page. From the list of officially supported providers, **please select OpenAI**.
> **💡 Tip:** Why select OpenAI when we are using OneToken?
> This is because OneToken provides an interface that is fully compatible with the standard OpenAI API format. By selecting the OpenAI provider and modifying the proxy address (BaseURL), we can seamlessly connect to OneToken's services.
**3. Select the Model Provider**
Click to enter the "Providers" page. From the list of officially supported providers, **please select OpenAI**.
> **💡 Tip:** Why select OpenAI when we are using OneToken?
> This is because OneToken provides an interface that is fully compatible with the standard OpenAI API format. By selecting the OpenAI provider and modifying the proxy address (BaseURL), we can seamlessly connect to OneToken's services.
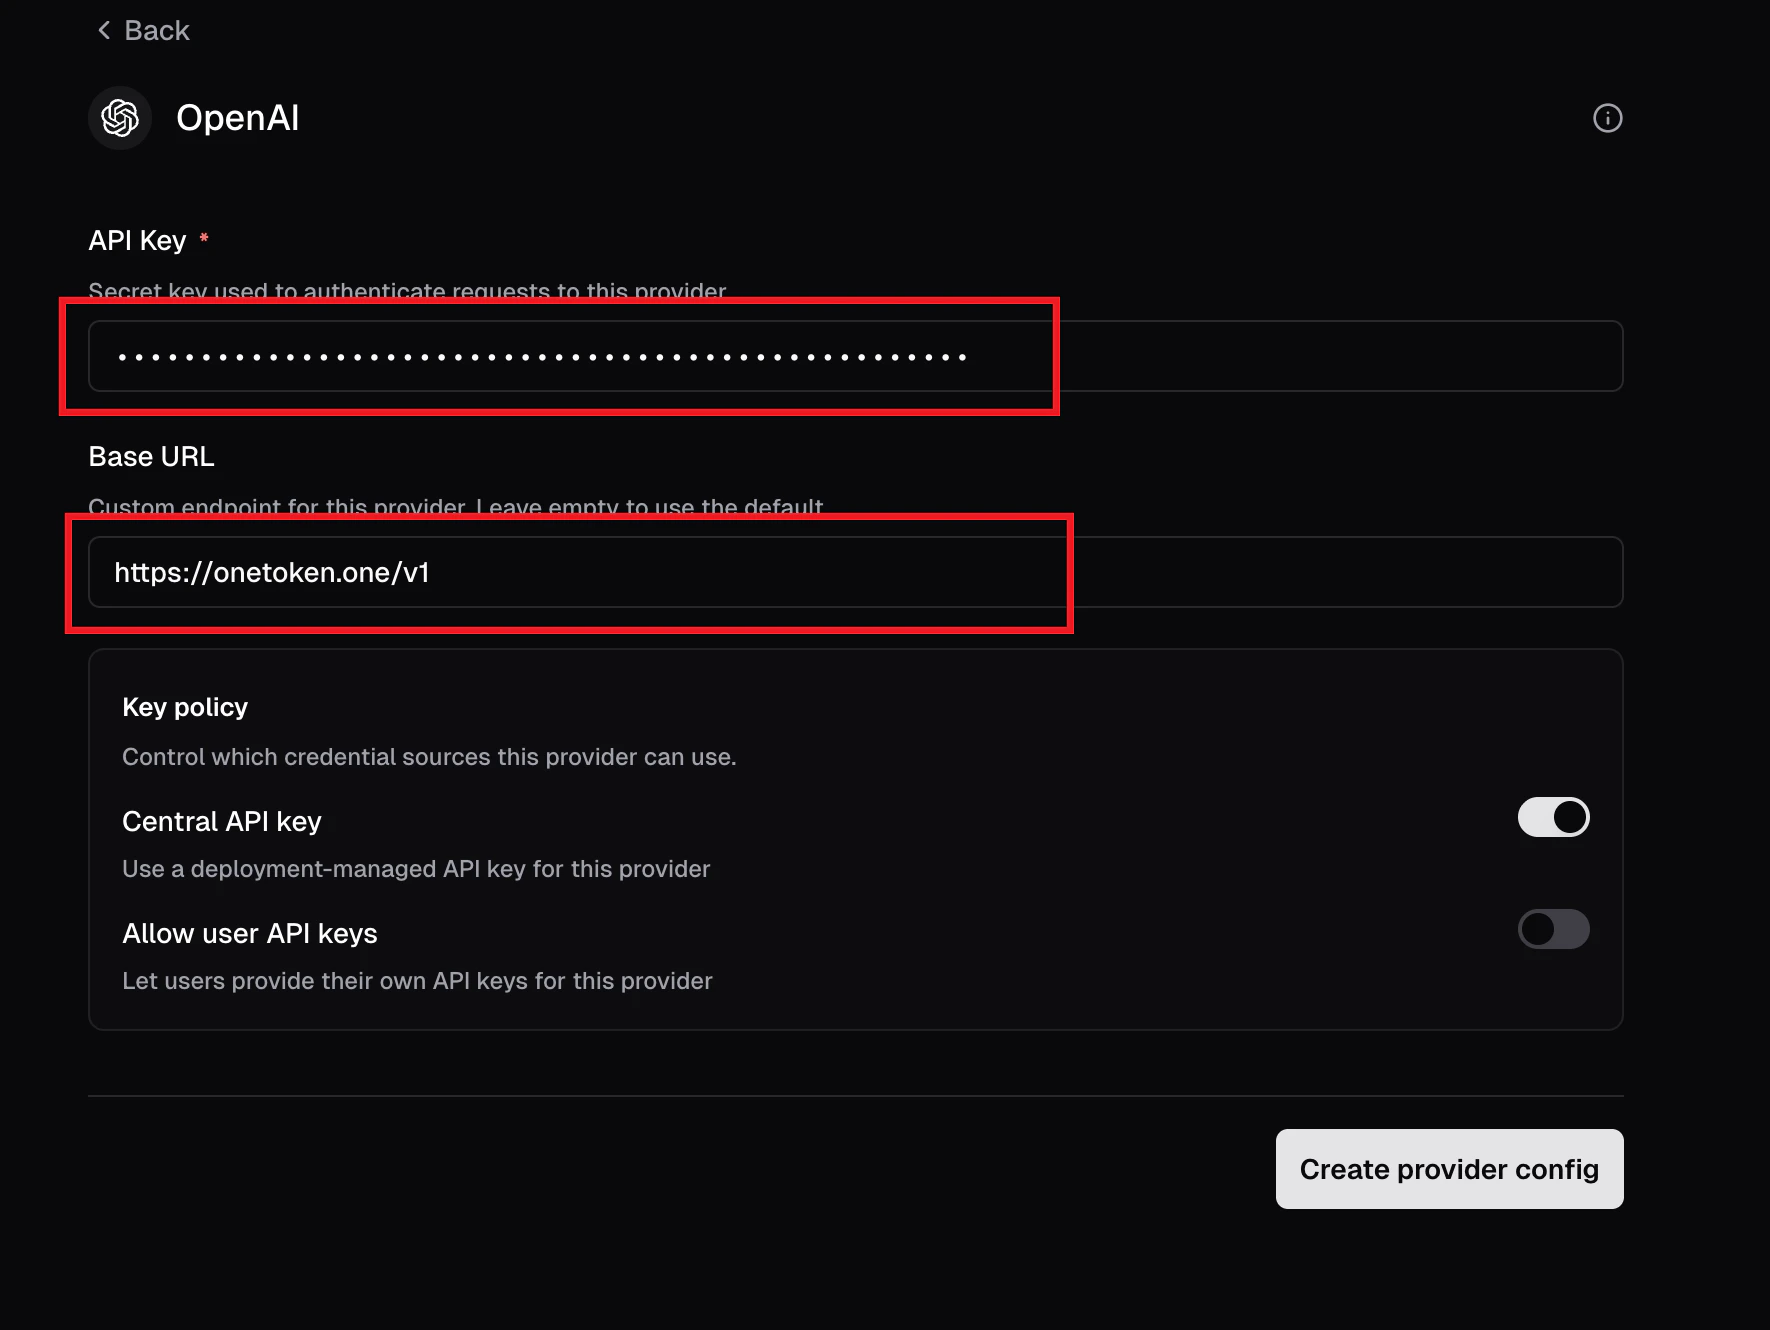
 **4. Fill in the Core API Parameters**
This is the most crucial step. Please accurately fill in the following information in the configuration form:
* **BaseURL:** Enter `https://onetoken.one/v1`
* **API Key:** Enter the OneToken API Key you obtained during the prerequisites stage.
Once you have confirmed the information is correct, click the "Create" button to save your configuration.
**4. Fill in the Core API Parameters**
This is the most crucial step. Please accurately fill in the following information in the configuration form:
* **BaseURL:** Enter `https://onetoken.one/v1`
* **API Key:** Enter the OneToken API Key you obtained during the prerequisites stage.
Once you have confirmed the information is correct, click the "Create" button to save your configuration.
 **5. Create and Bind Specific Models**
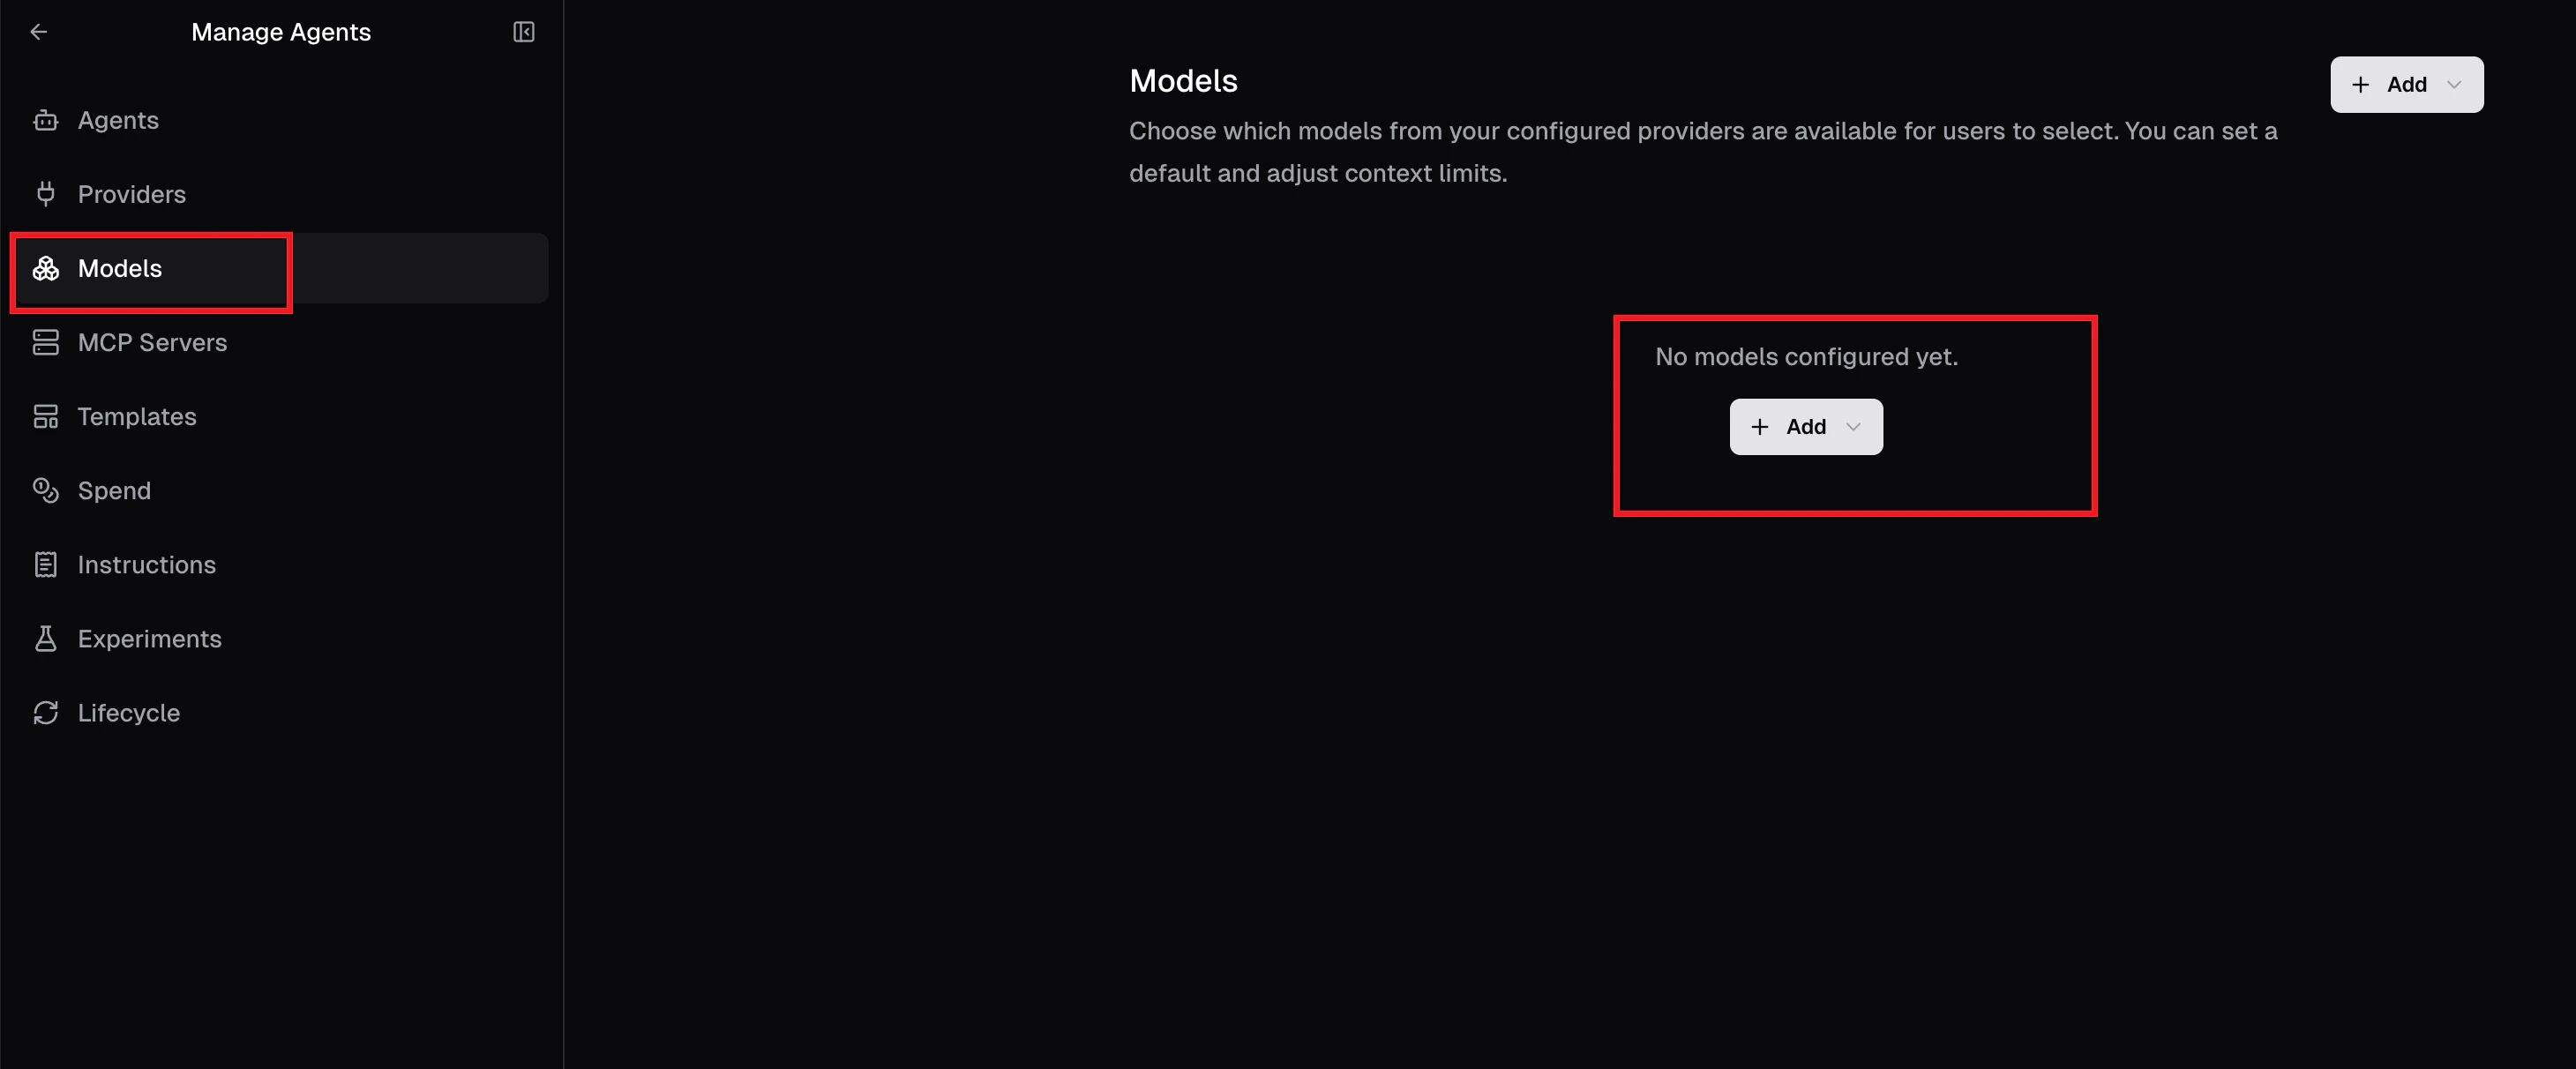
After configuring the provider, navigate to the "Models" page. Click to create a new model, manually input the name of the model you wish to use (e.g., `gpt-4o`, `claude-3-5-sonnet`, etc. Please refer to the OneToken platform for the supported model list), and link it to the provider you just created.
**5. Create and Bind Specific Models**
After configuring the provider, navigate to the "Models" page. Click to create a new model, manually input the name of the model you wish to use (e.g., `gpt-4o`, `claude-3-5-sonnet`, etc. Please refer to the OneToken platform for the supported model list), and link it to the provider you just created.
 **6. Chat Test and Usage**
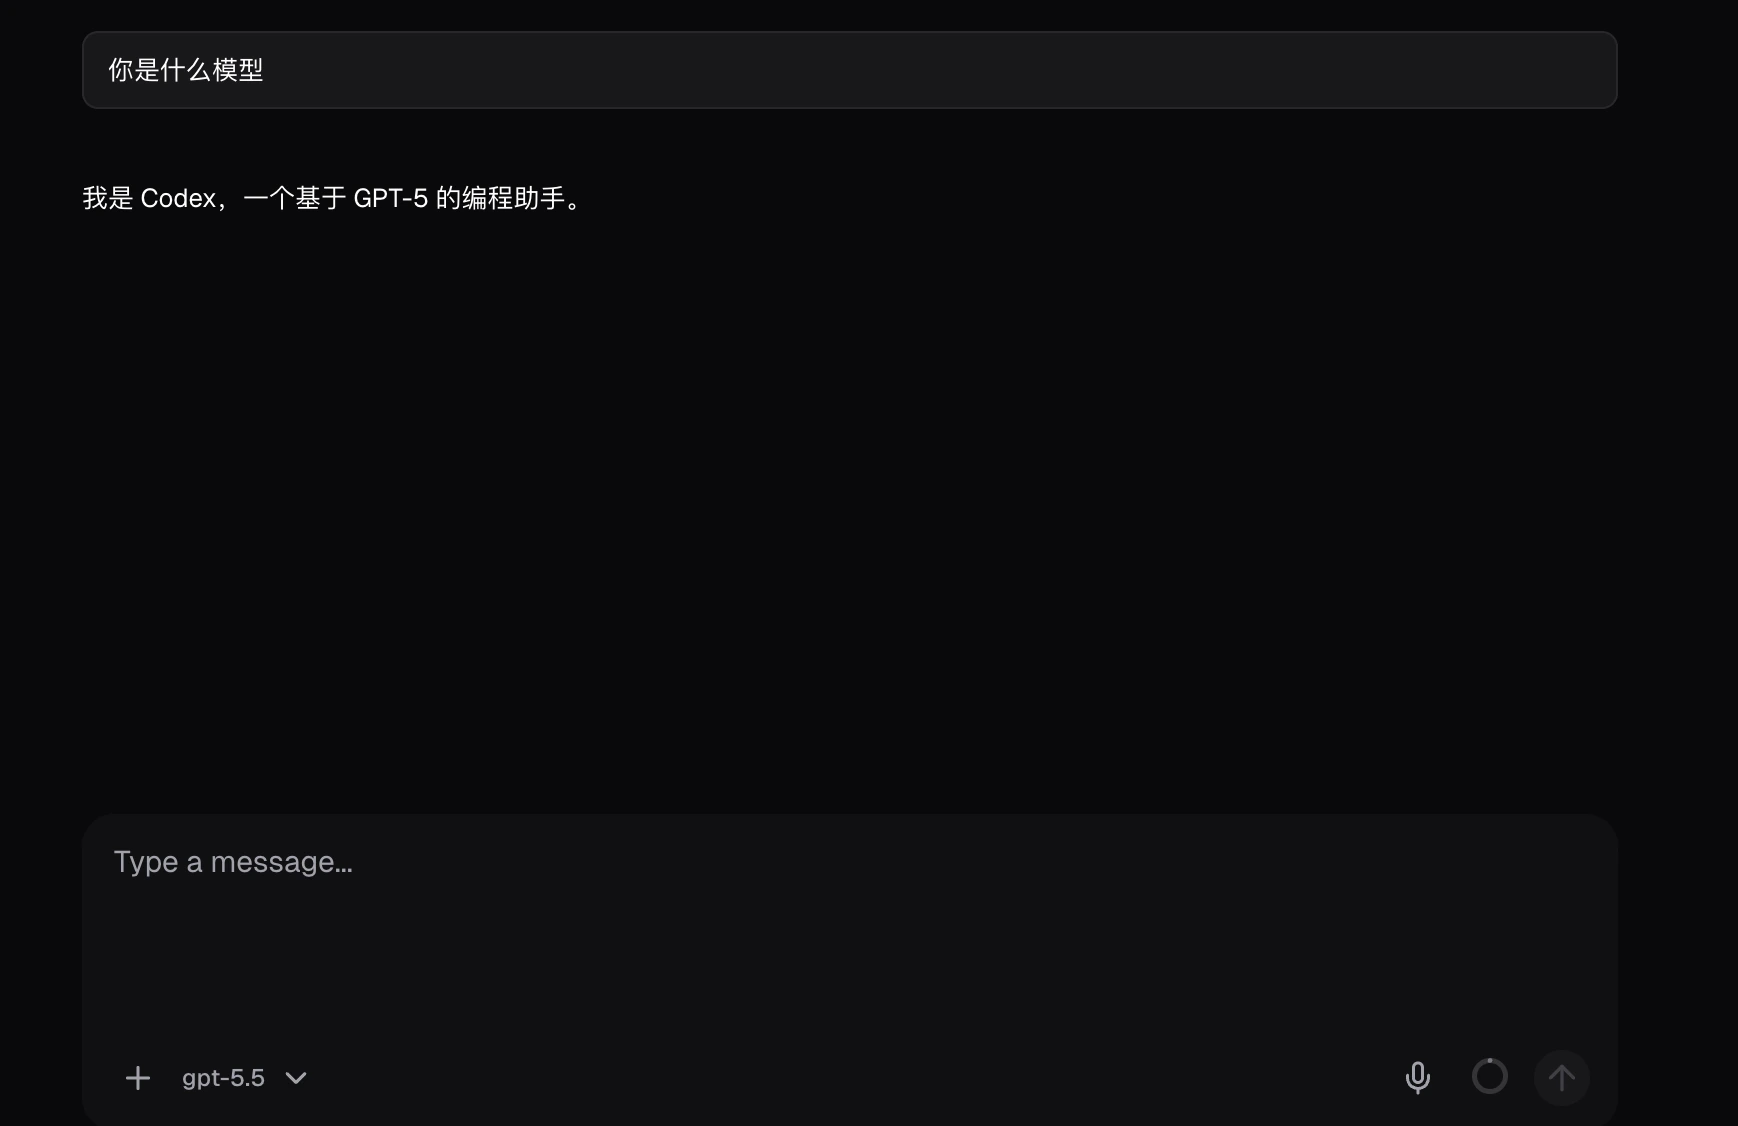
Once all configurations are complete, return to Coder's main chat interface.
Send a simple test message (e.g., "Hello, testing the connection."). If the model responds normally and quickly, your configuration is successful, and you are ready to go!
**6. Chat Test and Usage**
Once all configurations are complete, return to Coder's main chat interface.
Send a simple test message (e.g., "Hello, testing the connection."). If the model responds normally and quickly, your configuration is successful, and you are ready to go!
 ***
### 🛠️ FAQ & Troubleshooting
If you encounter errors during the test in Step 6, please check the following:
* **Incorrect BaseURL Format:** Double-check your BaseURL and ensure there are no trailing slashes (Correct format: `https://onetoken.one/v1`).
* **Invalid API Key:** Ensure the API Key is copied completely without any accidental leading or trailing spaces.
* **Incorrect Model Name:** Make sure the model name you entered in Step 5 actually exists and is currently supported on the OneToken platform.
***
### 🛠️ FAQ & Troubleshooting
If you encounter errors during the test in Step 6, please check the following:
* **Incorrect BaseURL Format:** Double-check your BaseURL and ensure there are no trailing slashes (Correct format: `https://onetoken.one/v1`).
* **Invalid API Key:** Ensure the API Key is copied completely without any accidental leading or trailing spaces.
* **Incorrect Model Name:** Make sure the model name you entered in Step 5 actually exists and is currently supported on the OneToken platform.