> ## Documentation Index
> Fetch the complete documentation index at: https://doc.onetoken.one/llms.txt
> Use this file to discover all available pages before exploring further.
# OpenAI Codex
> Use Codex through the Onetoken API
## Install
### Official download (macOS)
[https://openai.com/codex/](https://openai.com/codex/)
### CLI
```bash theme={null} theme={null}
npm install -g @openai/codex
```
## Environment / config
### Config files
1. Edit `~/.codex/config.toml`:
```toml theme={null} theme={null}
profile = "OneToken"
[model_providers.OneToken]
name = "OneToken"
base_url = "https://onetoken.one/v1"
personality = "pragmatic"
wire_api = "responses"
[profiles.OneToken]
model = "gpt-5.2"
model_provider = "OneToken"
model_reasoning_effort = "high"
```
2. Edit `~/.codex/auth.json`:
```json theme={null} theme={null}
{
"OPENAI_API_KEY": "Onetoken_API_KEY"
}
```
### CC-Switch
1. Open CC-Switch → add a provider.
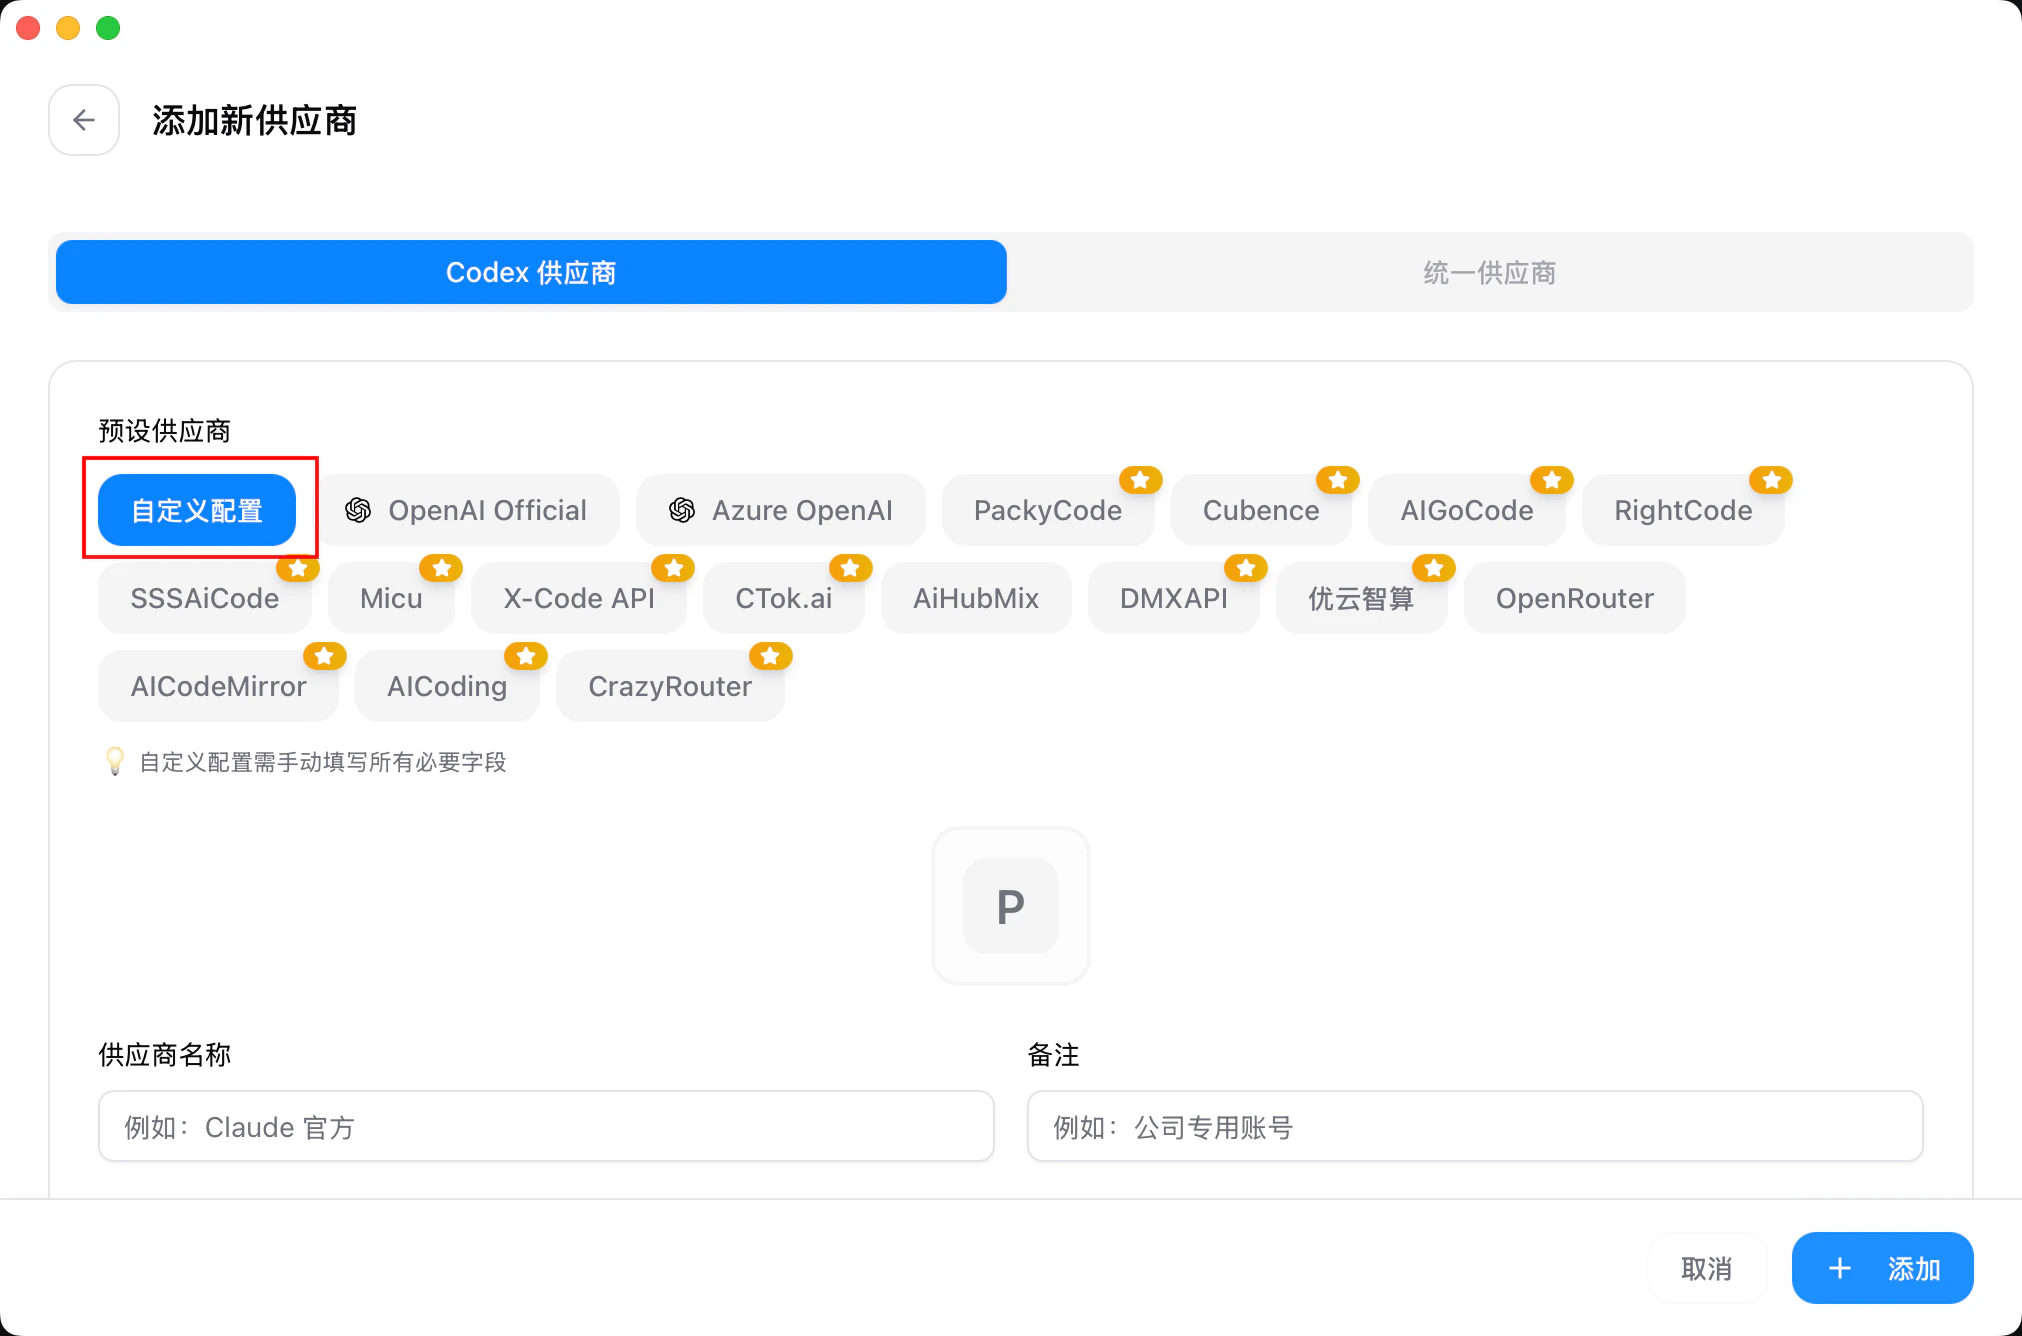
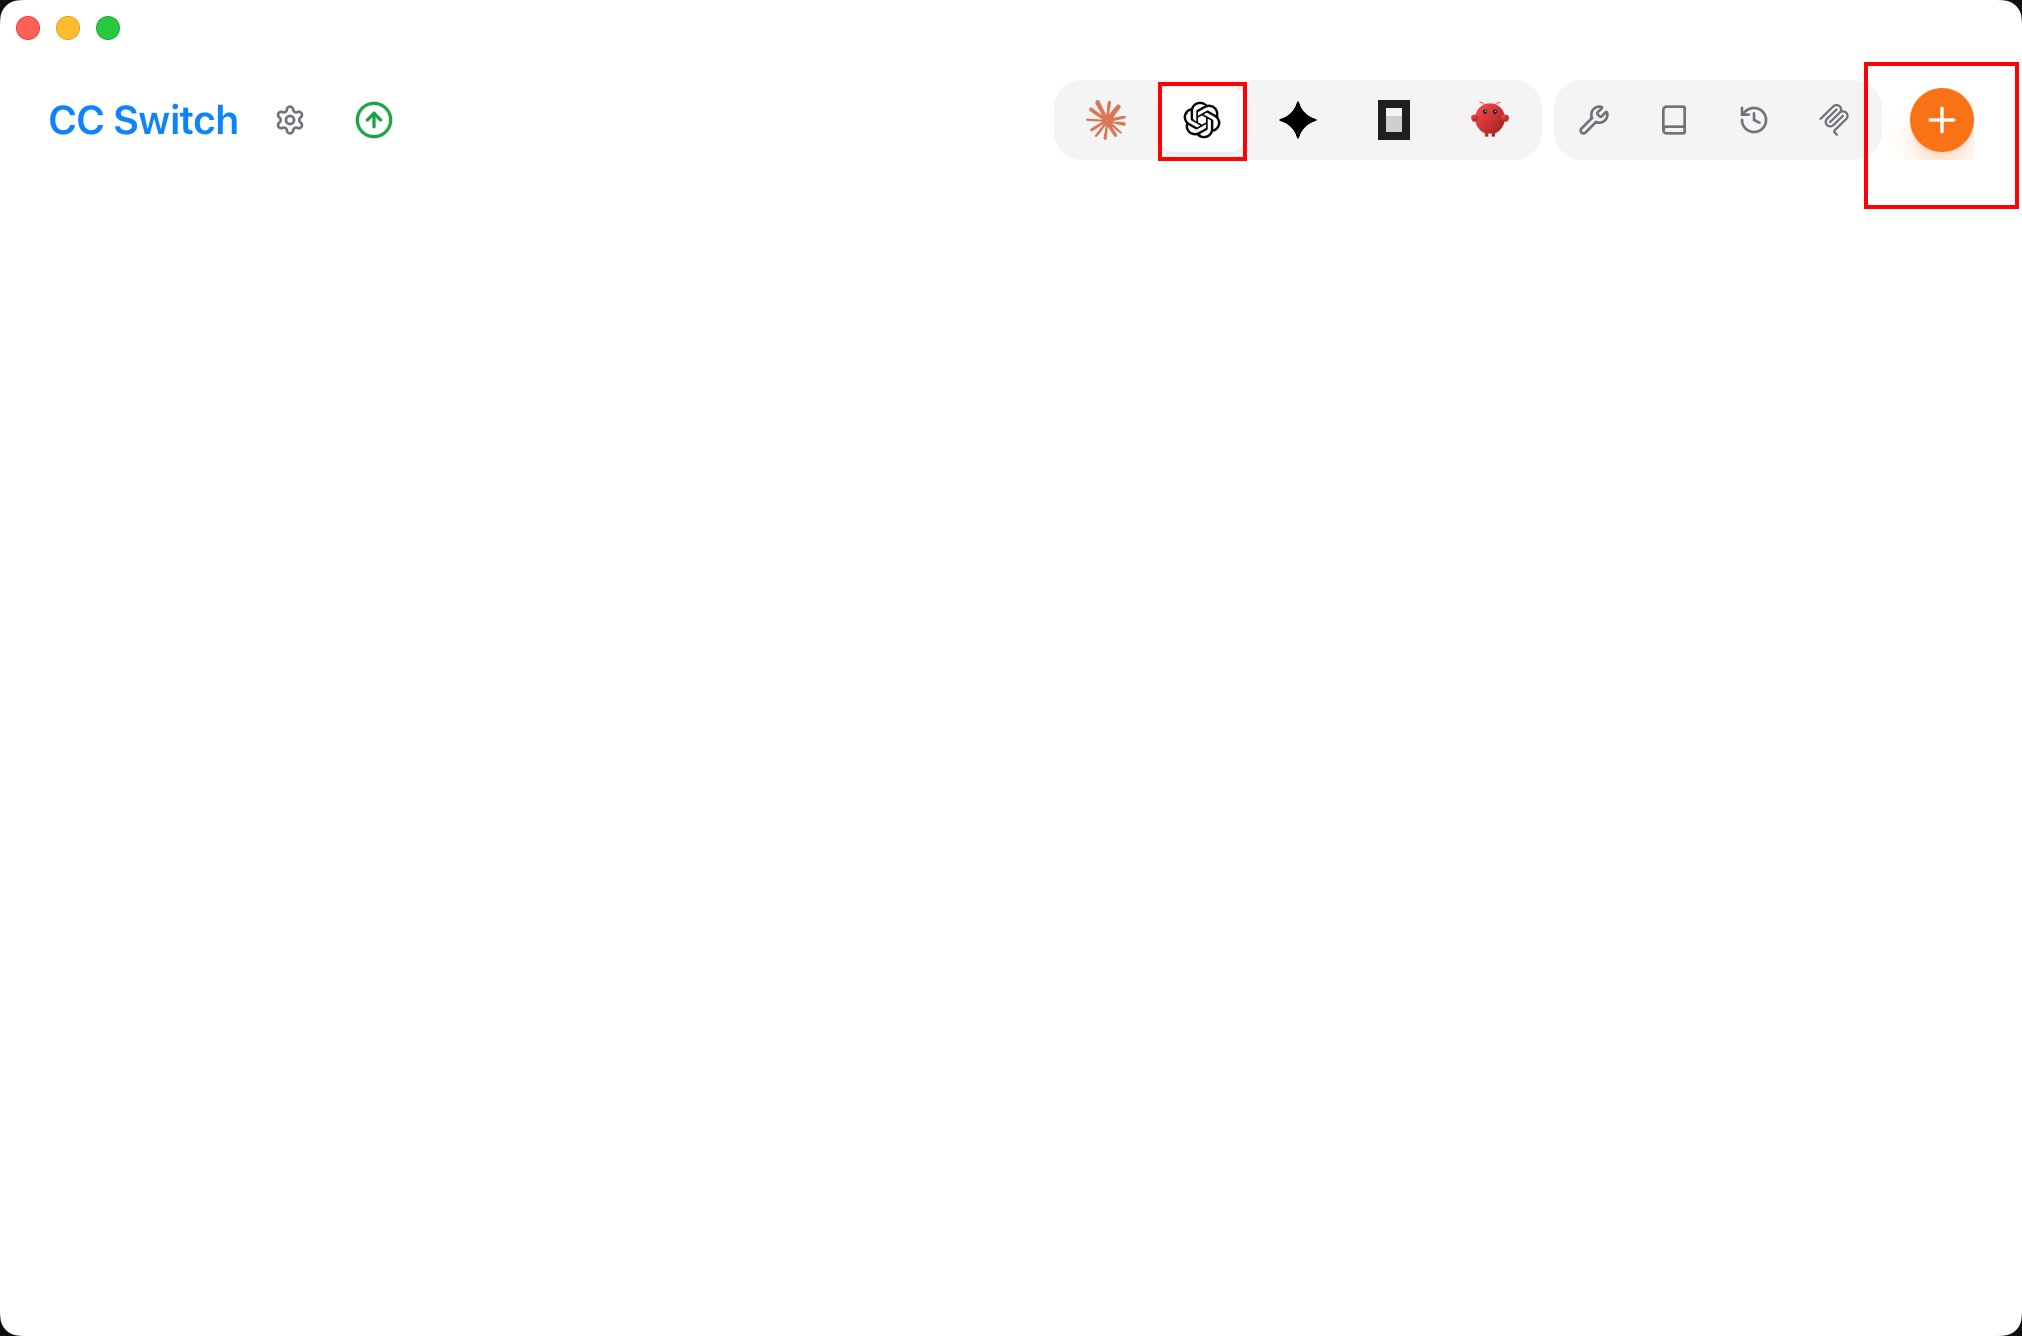 2. Pick **OneToken** from presets.
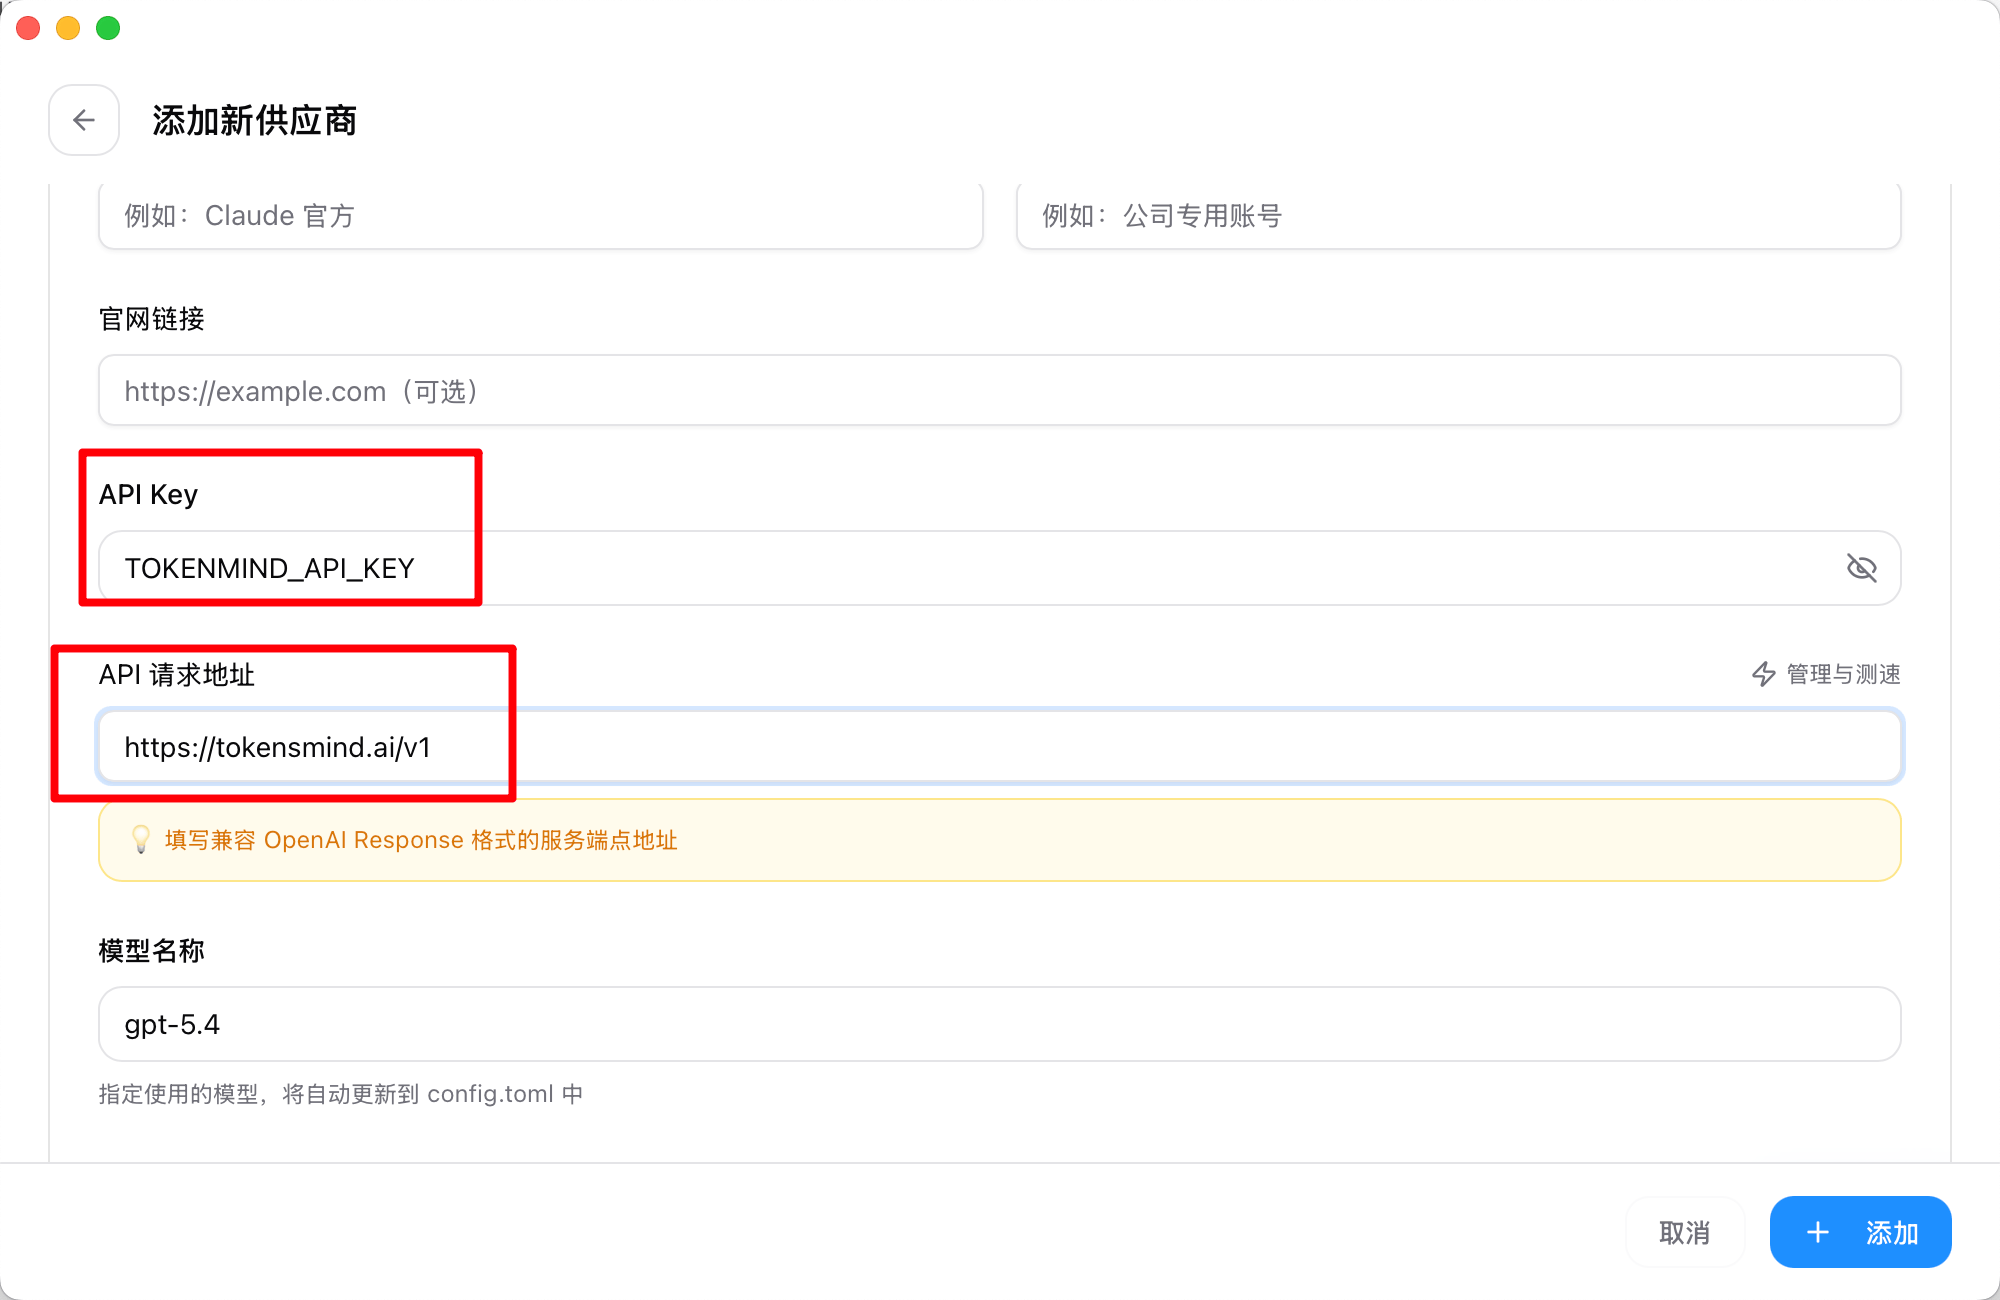
 3. Paste your API key → **Add**.
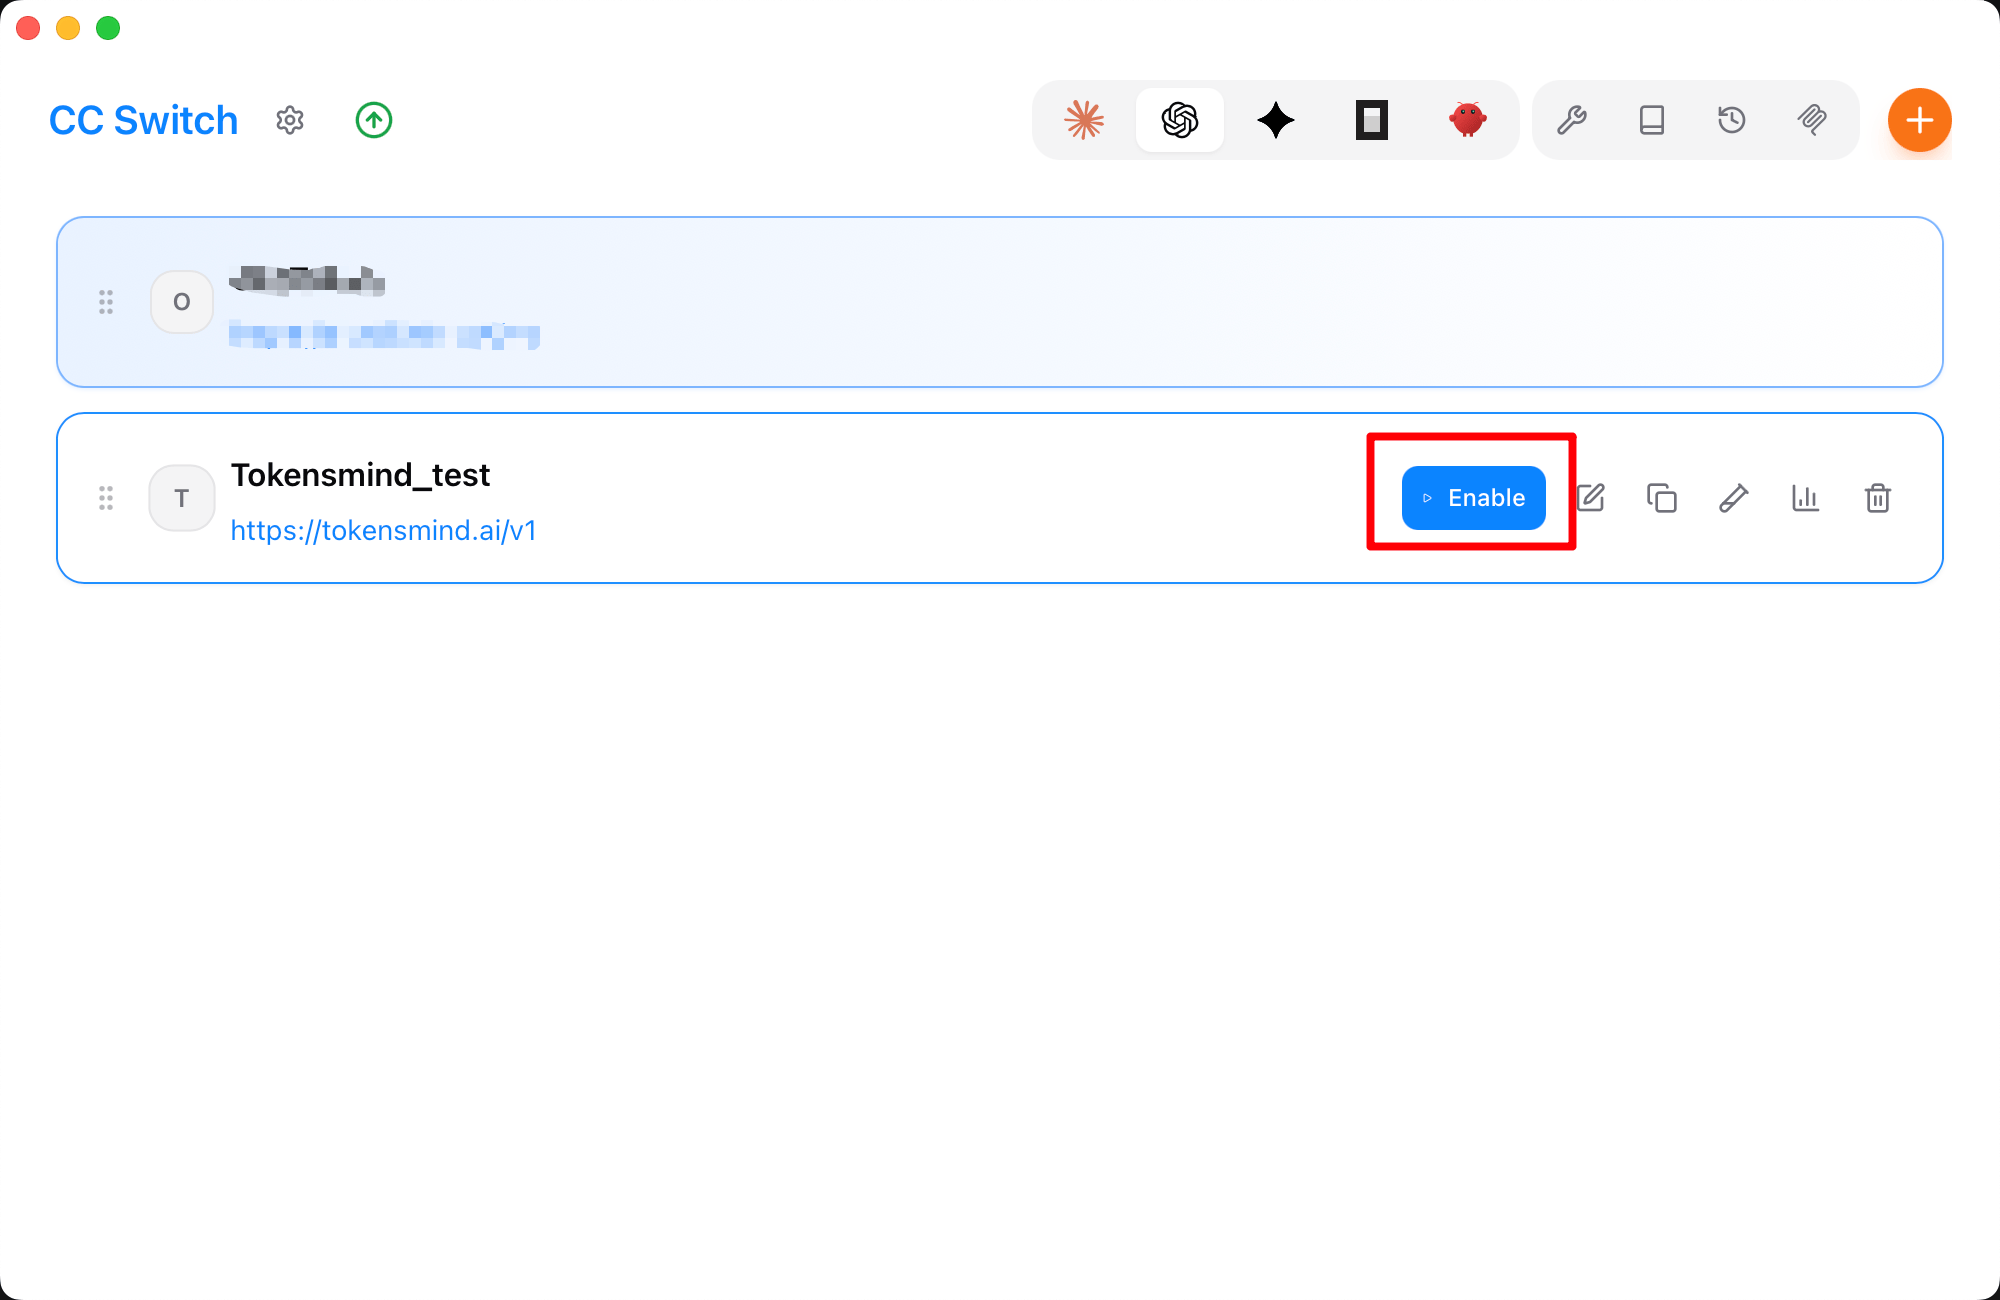
 4. Select **OneToken** on the home screen → **Enable**.
 ## Using Codex
### Terminal
1. `cd` to your project, run `codex`.
```bash theme={null} theme={null}
cd /path/to/your/project
codex
```
2. Set permissions as prompted.
## Using Codex
### Terminal
1. `cd` to your project, run `codex`.
```bash theme={null} theme={null}
cd /path/to/your/project
codex
```
2. Set permissions as prompted.
 3. Choose a model.
 4. Type a natural-language task—if you get a reply, setup works.
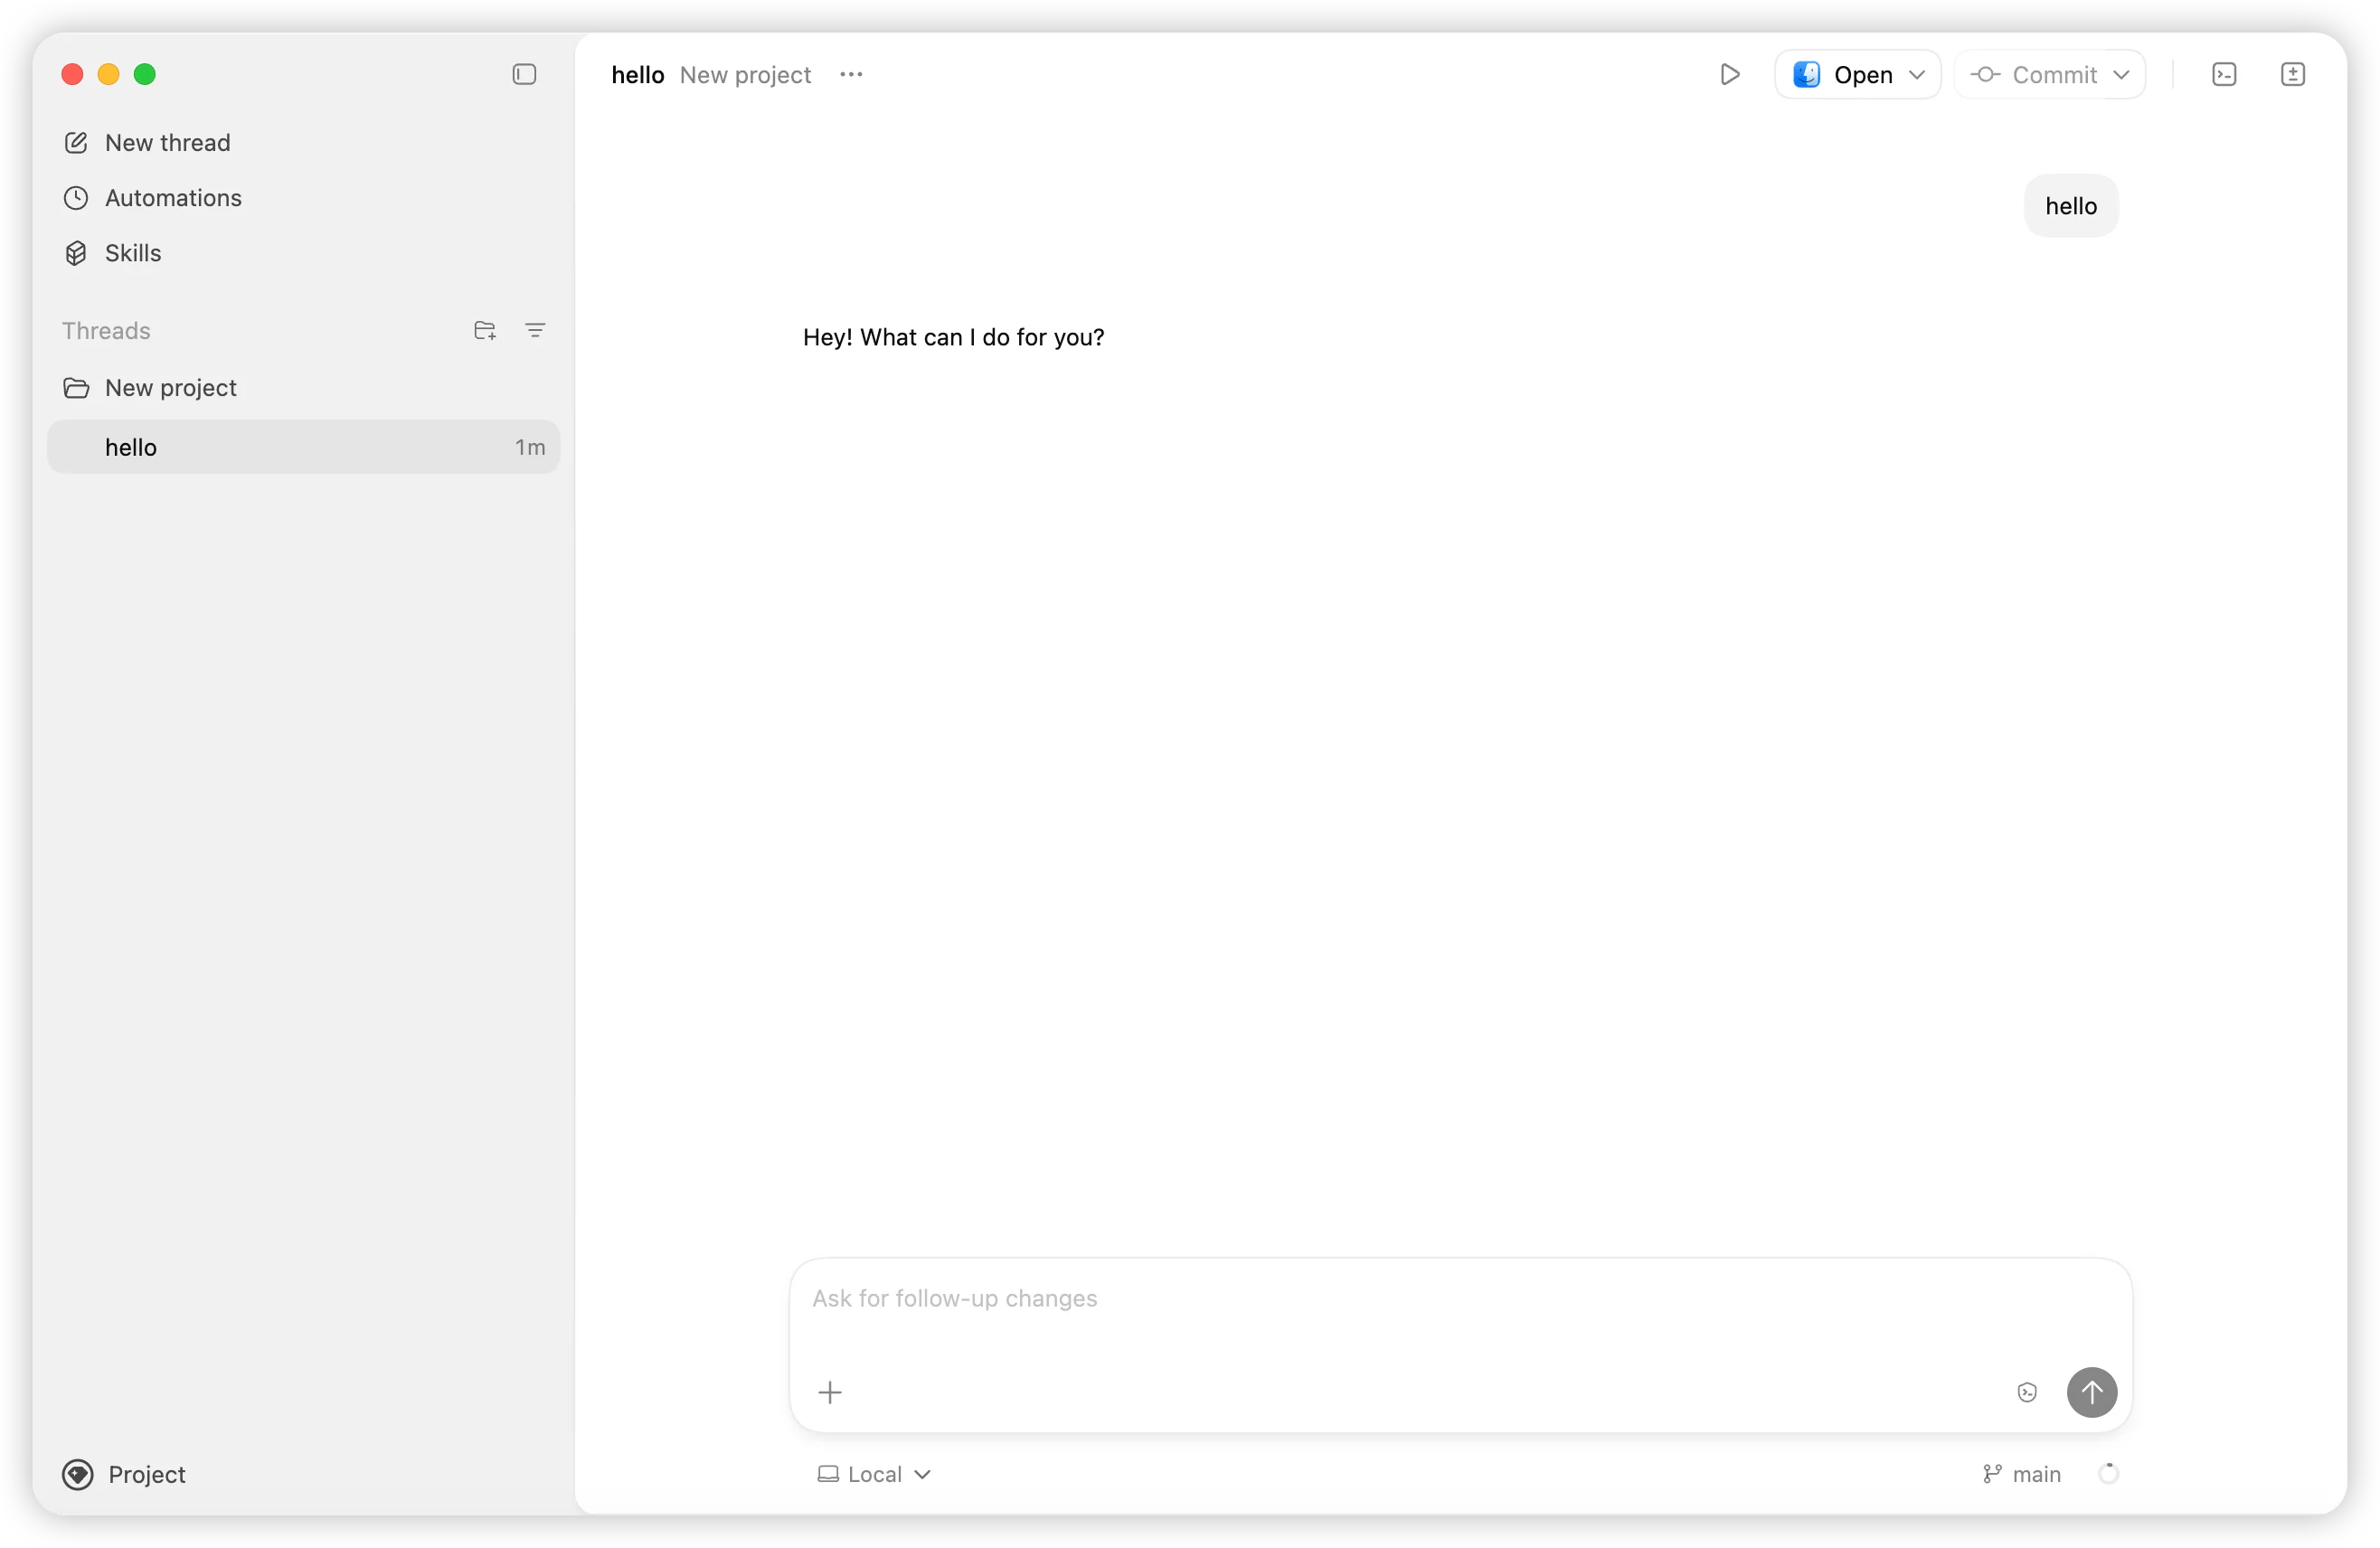
 ### Desktop app
1. Open Codex, pick a workspace folder.
2. Enter a task—if it responds, you’re good.
### Desktop app
1. Open Codex, pick a workspace folder.
2. Enter a task—if it responds, you’re good.
 ## CLI reference
### Help
```bash theme={null} theme={null}
codex -h
```
### Options (excerpt)
```bash theme={null} theme={null}
Usage
$ codex [options]
Options
-h, --help Show help and exit
-m, --model Model to use (default: codex-mini-latest)
-i, --image Path to an image input file
-v, --view Inspect a saved rollout
-q, --quiet Non-interactive: print only final assistant output
-a, --approval-mode Override approval: 'suggest', 'auto-edit', or 'full-auto'
--auto-edit Auto-approve file edits; still confirm shell commands
--full-auto Auto-approve edits and commands in the sandbox
--no-project-doc Do not auto-include repo `codex.md`
--project-doc Include a specific Markdown file as context
--full-stdout Do not truncate command stdout/stderr
Dangerous
--dangerously-auto-approve-everything
Skip all confirmations and run commands (no sandbox)
For temporary local testing only
Experimental
-f, --full-context “Full context” mode: load the whole repo and batch-edit
Requires --model
Examples
$ codex "Write and run a Python program that prints ASCII art"
$ codex -q "Fix the build"
```
## CLI reference
### Help
```bash theme={null} theme={null}
codex -h
```
### Options (excerpt)
```bash theme={null} theme={null}
Usage
$ codex [options]
Options
-h, --help Show help and exit
-m, --model Model to use (default: codex-mini-latest)
-i, --image Path to an image input file
-v, --view Inspect a saved rollout
-q, --quiet Non-interactive: print only final assistant output
-a, --approval-mode Override approval: 'suggest', 'auto-edit', or 'full-auto'
--auto-edit Auto-approve file edits; still confirm shell commands
--full-auto Auto-approve edits and commands in the sandbox
--no-project-doc Do not auto-include repo `codex.md`
--project-doc Include a specific Markdown file as context
--full-stdout Do not truncate command stdout/stderr
Dangerous
--dangerously-auto-approve-everything
Skip all confirmations and run commands (no sandbox)
For temporary local testing only
Experimental
-f, --full-context “Full context” mode: load the whole repo and batch-edit
Requires --model
Examples
$ codex "Write and run a Python program that prints ASCII art"
$ codex -q "Fix the build"
```